 eMail
michael@TerminatorMallets.co.nz
 eMail
michael@TerminatorMallets.co.nz
QUADWAYS Home New Stuff Croquet Stuff Pricelist FAQ
Breaking News....I sold the Quadway part of th business at Christmas 2024. I'm still doing the accessories and mallets as normal The new owner is Quadway Hoops Ltd, Jarrod Coutts Owner 81a Forest Drive, Methven,7730 , New Zealand ph. +64 27 268 3885 Txt +64 27 268 3885 e. jarrod.coutts@gmail.com (temp) Jarrod has been playing Croquet for 21 years and is a top player in both codes. He has agents in the USA, Australia, and the UK |
|
|
Get going with your Quadways .... with Terminator accessories
Lawn accessory prices are in NZ$ Plus GST in NZ and Australia
| Sabot | QS | $200 |
| Super Lifter "H" base | HS | $200 |
| Super Clamp "tool free" | HC | $200 |
| Lawn Drilling Template | QLD | 120 |
| Lawn Protector | QLP | 99 |
| QuadSocket 3x Set of 6 inc peg | QSS3 | $1,020 |
| QuadSocket 2x Set of 6 inc peg | QSS2 | $880 |
| QuadSocket 1x Set of 6 inc peg | QSS1 | $740 |
| TigerHoops Set of 6 | THS | $785 |
| TigerHoop Single | THSH | $165 |
| TigerHoopPeg | THP | $35 |
Lawn accessory prices are in NZ$ Plus GST in NZ and Australia
|
|
|
|
Sabot (say it like saboteur )The Sabot slides over the top of the hoop Hidden in the top is 55mm of solid steel. (2") That upper protects the hoop from being munted... The steel sides front & back take all the stress off the adjustable top corners. Some clubs use the Sabot instead of a mallet for firming hoops into the ground. The latest version has an industrial grade padding inside the top. (Helps to save the powder-coating) Maybe one per 4 lawns . Used by your lawns team
|
|
SuperClampNot a new idea but refined for speedy use You might not need this for normal club play BUT they are essential for competition. Because balls are not identical, and competition hoop spacing is usually "Ball + Clearance", a SuperClamp will allow you to set hoops to the competition specs. Tool-less adjustment, and strong. Maybe one per 4 lawns. Used by your lawns team. The "Spacer" is pre-set to 93mm and is marked with 3 dots.. So.. To adjust the spacer:-
Setting hint:- Put the clamp right down to the Carrots... for maximum leverage. |
|
SuperLifterUses the principles of a carpenters hammer for pulling out nails..leverage. Not much bigger than a carpenters hammer so you can have one on each trolley.. The "H" base stops your lawns being pulled out. Your ladies will love them. Easy to use and nice and light. Maybe one for each trolley/lawn. Used by your players to undress their lawn. Lawn saving hint:- Train your players to "Stamp" on the hoop holes after the hoop comes out.. You will be amazed how long the holes remain good. BTW.. At the "Worlds" we got a week's play from the same hoop holes. |
|
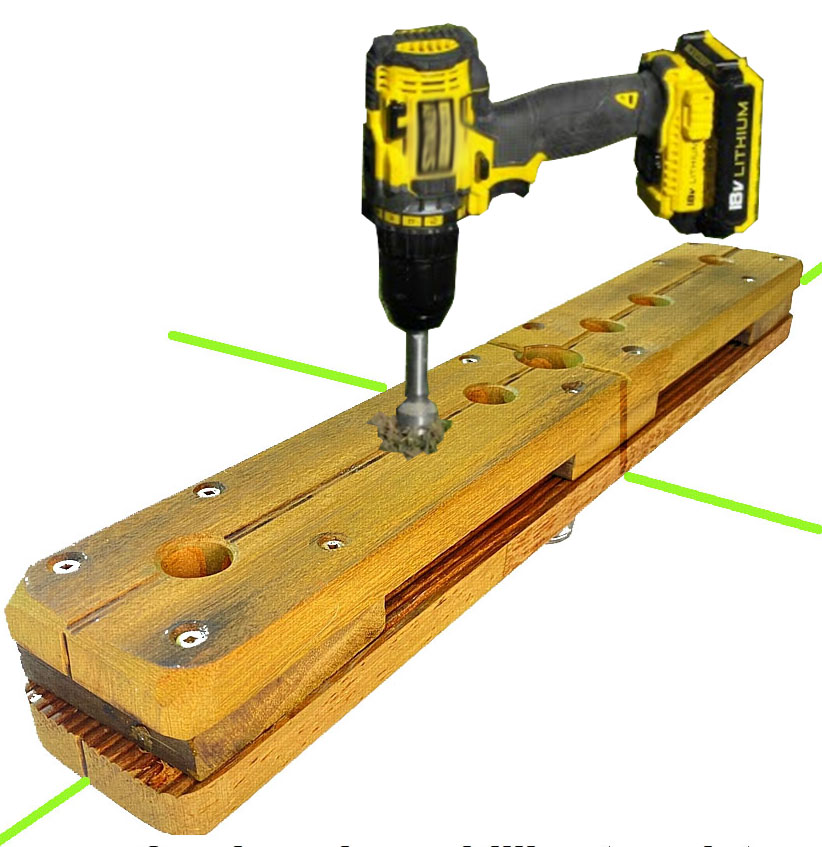
LawnDrillingTemplateWith a peep hole in the middle so you can see the strings... Drill your 6 holes with a 20mm~3/4" auger bit.. 100mm~ 4" deep Use the 2 middle holes Loosely fill the other 4 holes for later use (swinging the hoops) Note.. Drill not included. |
|
|
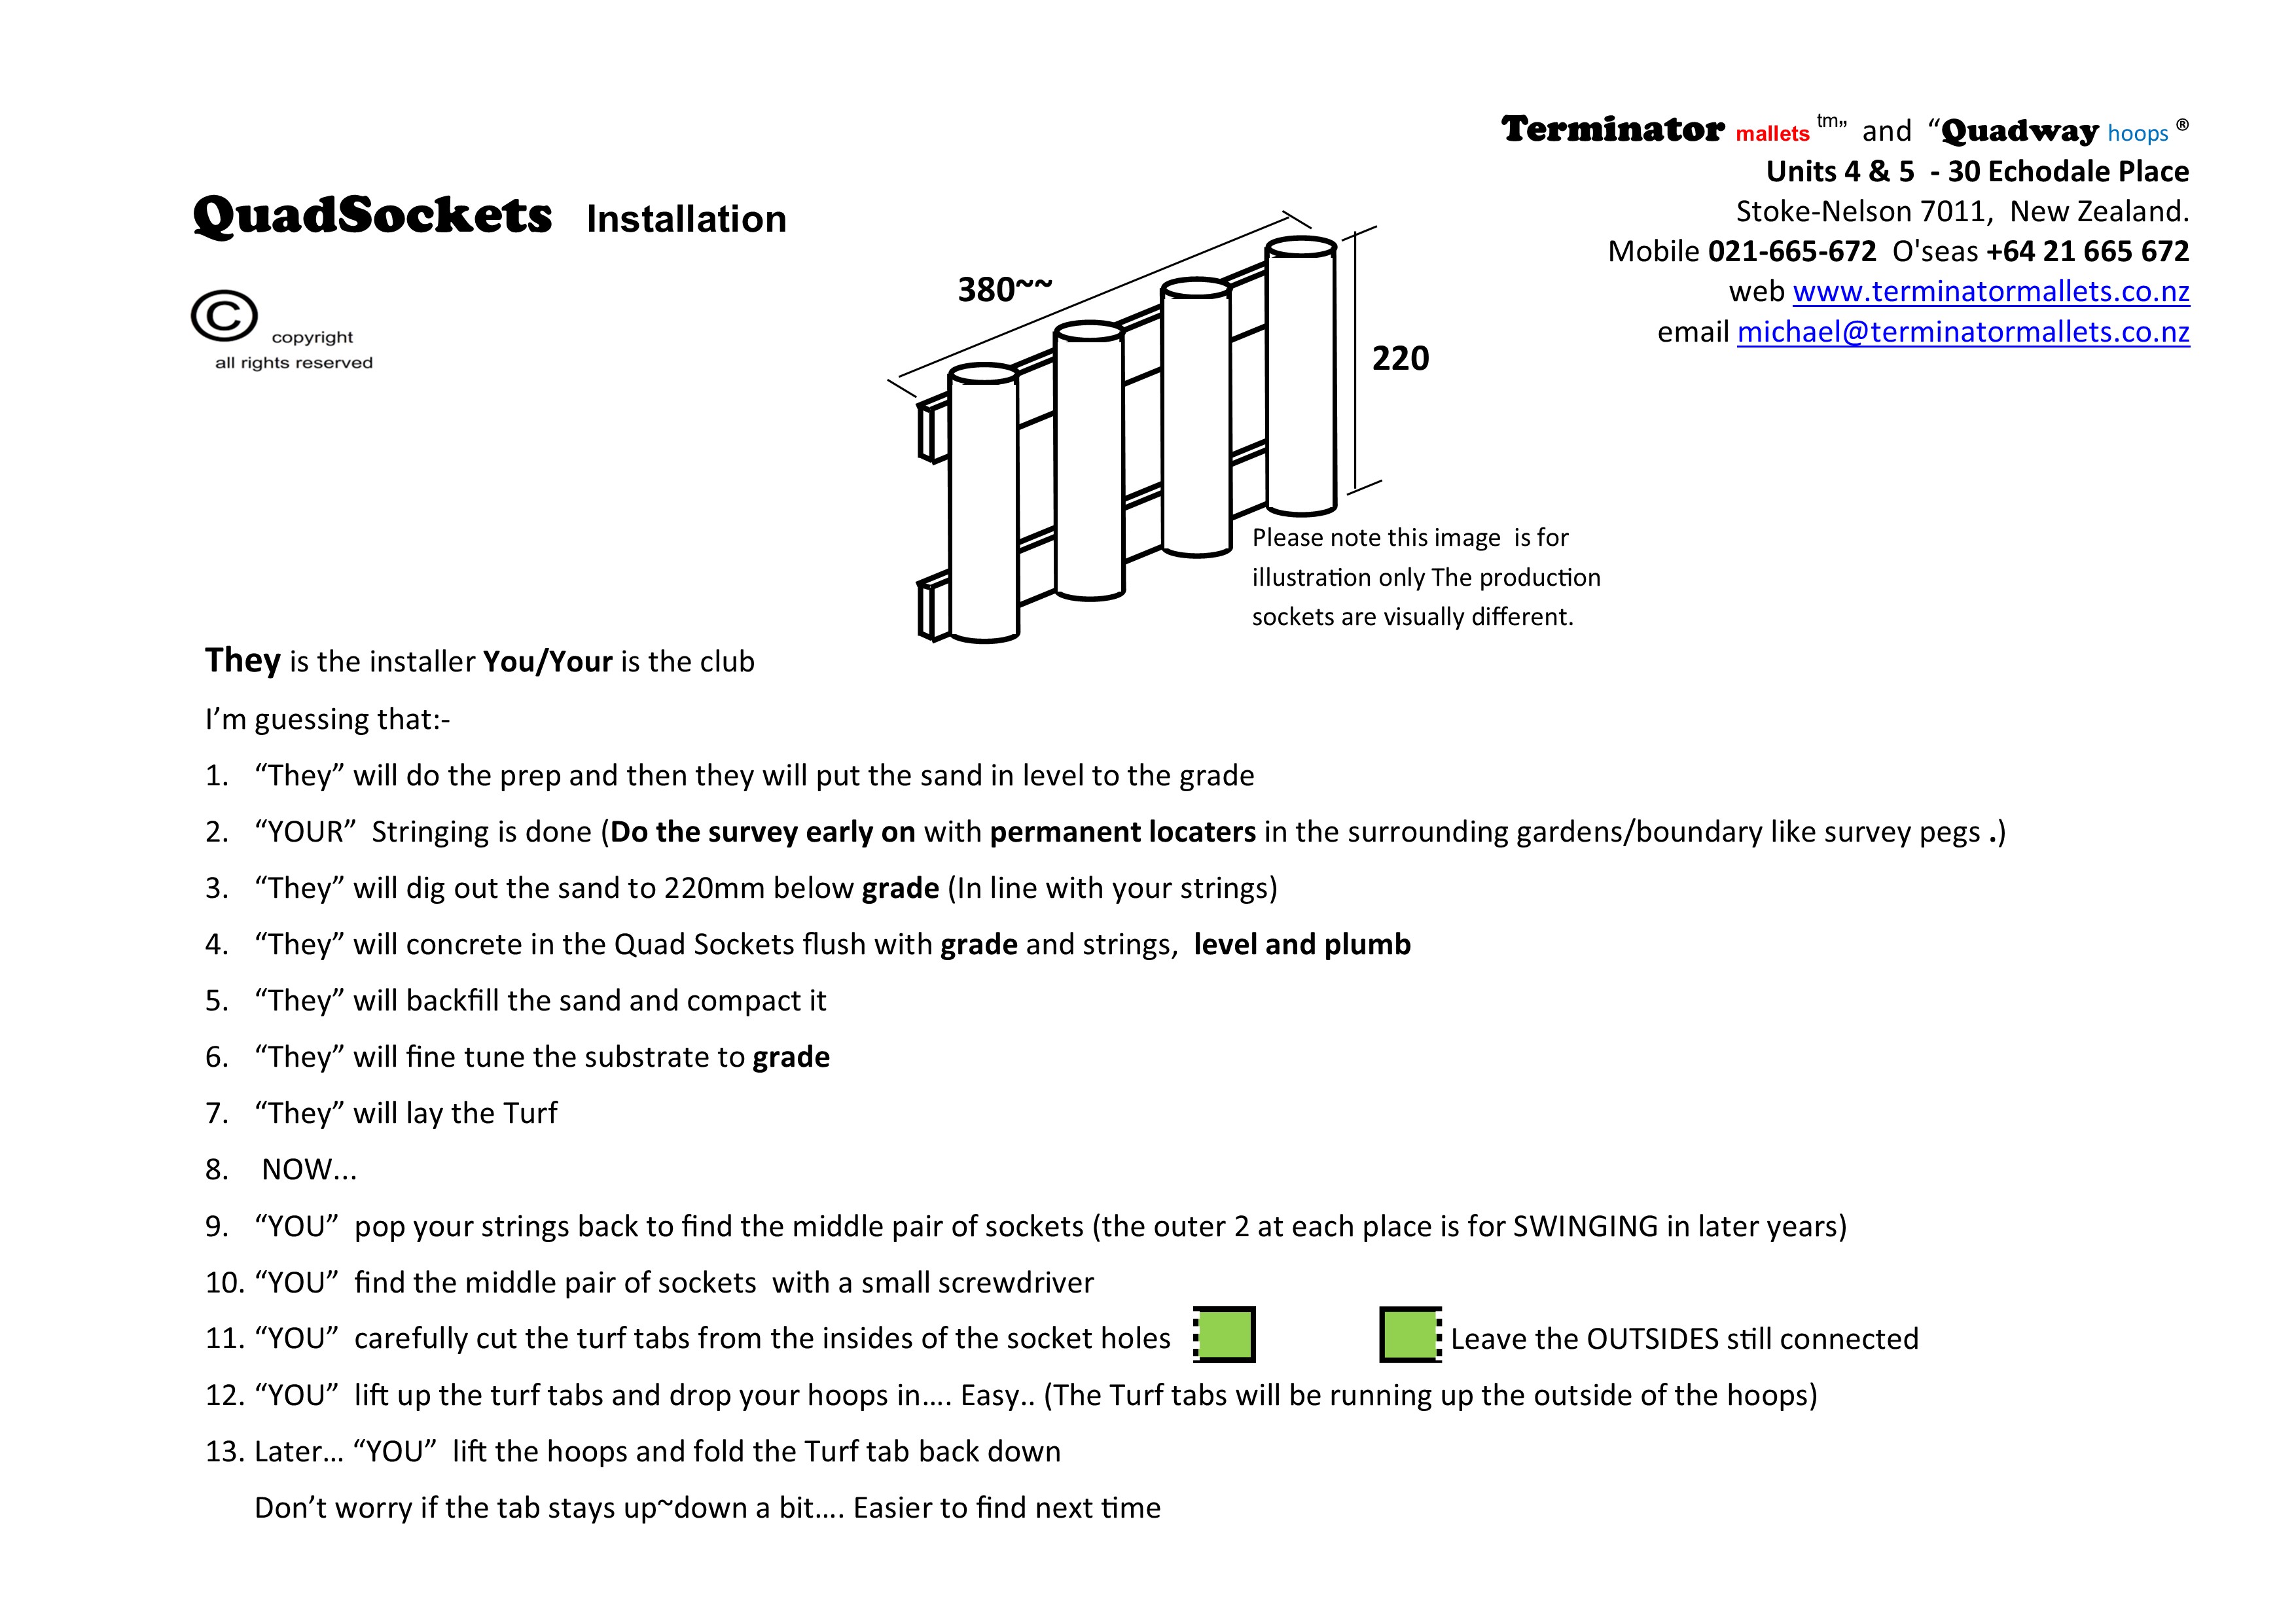
Planning PERMANENT lawns ??? Thankfully... Lawns designed for Croquet have an "underlay" and a "turf" length that provides a more "normal" feel for play. If you are lucky enough to be in at the planning stage.... THEN you can have our 3x QuadSockets installed when the lawns are laid. 3x QuadSockets use normal Quadway hoops and that way you have all the Quadway benefits..
QuadSockets are avail in :- 2 tubes (for one hoop position) 3 tubes (for two hoop positions) 4 tubes (for three hoop positions)
|
 |
Quotes Are good for several months and are based on predicted costing at that later date of supply. In the case of multiple quotes, then the most recent quote would apply.
Or eMail michael@TerminatorMallets.co.nz
Freight.. I get good rates from my couriers in NZ AND very good rates to Australia.
Australia . Aussie Agent is Lindsay David in Brisbane.. e. sales@StarMallets.Com ph. +61 403 489 967
There is no import duty on NZ made products... Thank you CER .. (Closer Economic Relationship)
We provide the "NZ Made" certificate
You might get pinged for Tax on imports greater than $AU 1,000 and that is for you to pay. (Lindsay will factor that for you)
You can do international direct credit payment for larger orders straight from your internet banking.
Fees are sometimes charged at both ends...So if you choose to do D.C. then please add $15 to cover the cost at our end.
Credit Card Visa/M'card convenience. There is a 2% charge. BUT/AND that is often cheaper than other options... And in 21 years I've had no issues.
However michael@TerminatorMallets.co.nz
DHL is our preference for goodies to the USA. Usually about a week~10 days now that the planes are flying again.
Pricing Plus GST in NZ and Australia. All prices are in NZ$
| Sabot (say
it the same as saboteur..... someone who threw the wooden shoe into the
machine) .. Do I need one? ... probably one for each lawn. The Quadways are precision made and they are strong BUT !!! What might not be clear are the potential issues..
Setting lawns for competition play.
12 minutes per lawn total time if you are organised... |
|
| Why make/use a plywood
Lawn Protector when making the dibber holes? When you lever the Dibber out with a crowbar, you will have something to lever off. " Give me a fulcrum..and a lever long enough.. and I can move the World". where have I heard that before ? Dibber spikes get massive friction in the ground.. When you lift without the Plywood Lawn Protector you will rip out the lawn
|
|
|
Can we swing the hoops ?
12 minutes per lawn total time if you are organised... |
 |
|
LawnDrillingTemplate
The center PeepHole lets you see the strings. Rock/roll the template and pull the string out of the way Drill the 6 holes For 3 sets of hoop positions . One set to use now... and a set each side... for later use.... EASY |
 |
QuadSockets ...Permanent sockets for Permanent lawns AND Traditional lawns
This installation shows the 3x socket/s So... Start using the MIDDLE pair... Then use the LEFT pair... Then use the RIGHT pair.
